
Introduction
Spring is finally here, and with it comes a burst of vibrant colors and fresh blooms that seem to awaken the world around us. The air is filled with the sweet scent of flowers, and the days grow longer and sunnier, inviting us to embrace the change of season. What better way to celebrate this renewal than by showcasing your individuality through charming nail art? Nail art is not just a trend; it’s a wonderful form of self-expression that allows you to communicate your personality and creativity. With a few basic supplies and a bit of inspiration, you can create beautiful designs right at home. This article aims to provide you with simple yet delightful nail art ideas that are perfect for spring, so roll up your sleeves, grab your polish, and let’s get started!
“Creating a cozy reading nook is all about maximizing comfort in a small space. It’s about intentional design that serves both function and feeling.”
– Interior Design Magazine
The Essentials: Tools and Materials for Nail Art
Before diving into the world of nail art, it’s essential to arm yourself with the right tools and materials. Here’s a list of basic supplies you’ll need to create stunning designs:
| Essential Tools | Description | Purpose |
|---|---|---|
| Nail Polish | Various colors | Base color and designs |
| Nail Brushes | Detailing and striping brushes | For intricate designs |
| Dotting Tools | Round-ended tools | Creating dots and flower centers |
| Makeup Sponges | Soft sponges | For blending colors |
| Top Coat | Clear polish | To seal and protect designs |
In addition to these essentials, consider adding optional tools like stencils, nail files, or nail art pens to enhance your designs further. The quality of nail polish you choose can significantly affect the longevity and appearance of your artwork, so invest in a few high-quality brands that offer good pigmentation and a smooth finish.
As for color palettes, spring is all about pastels and floral colors. Think soft pinks, gentle blues, lilacs, and sunny yellows that reflect the beauty of the season. Mixing and matching these colors can lead to delightful combinations that embody the spirit of spring.
Floral Nail Art Designs
Floral patterns are quintessential for spring nail art, bringing the vibrant beauty of blooms directly to your fingertips. Creating simple floral designs can be both fun and therapeutic, making it an excellent choice for nail art enthusiasts of all skill levels. Here’s how you can create a charming floral accent nail:
1. Start with a Base Color: Choose a light pastel shade as your base color and apply it evenly across all nails. Allow it to dry completely.
2. Create the Flowers: Using a dotting tool, dip it into a contrasting polish color, such as white or yellow, and create small dots in clusters to form petals. You can create simple daisy-like flowers by placing five dots in a circular pattern.
3. Add Details: Once the petals are dry, use a fine brush or a toothpick to add small circles in the center of each flower, giving them a pop of color and an extra detail.
4. Negative Space: Consider leaving some parts of your nails unpainted for a trendy negative space effect. This technique adds a modern touch to traditional floral designs.
5. Finish with Top Coat: Seal your design with a clear top coat to add shine and protect your artwork.
For a fresh spring look, combine colors like mint green with soft pink and white. This combination not only looks harmonious but also evokes the beauty of blooming gardens.
Pastel Ombre Nails
Ombre nails are a popular trend that offers an eye-catching gradient effect, perfect for spring. The ombre technique blends two or more colors seamlessly, creating a soft and stylish appearance. Here’s how you can master the pastel ombre look at home:
1. Select Your Colors: Choose a palette of pastel shades that complement each other. For example, light pink, lavender, and baby blue make for a lovely combination.
2. Apply Base Color: Paint your nails with the lightest color as a base and let it dry thoroughly.
3. Blending Colors: To create the ombre effect, use a makeup sponge to dab the second color onto the tip of the sponge. Lightly press the sponge onto your nail, starting from the tip and moving downwards. Repeat this step with the next color, overlapping slightly with the previous shade for a smooth transition.
4. Smooth Out the Gradient: If necessary, use a clean part of the sponge to blend the colors further, ensuring there are no harsh lines.
5. Seal Your Work: Once you achieve your desired gradient, finish with a top coat for a glossy finish.
This technique allows for endless creativity; you can experiment with different color combinations to reflect your style. The soft pastel look is perfect for any spring occasion, from brunches to picnics.
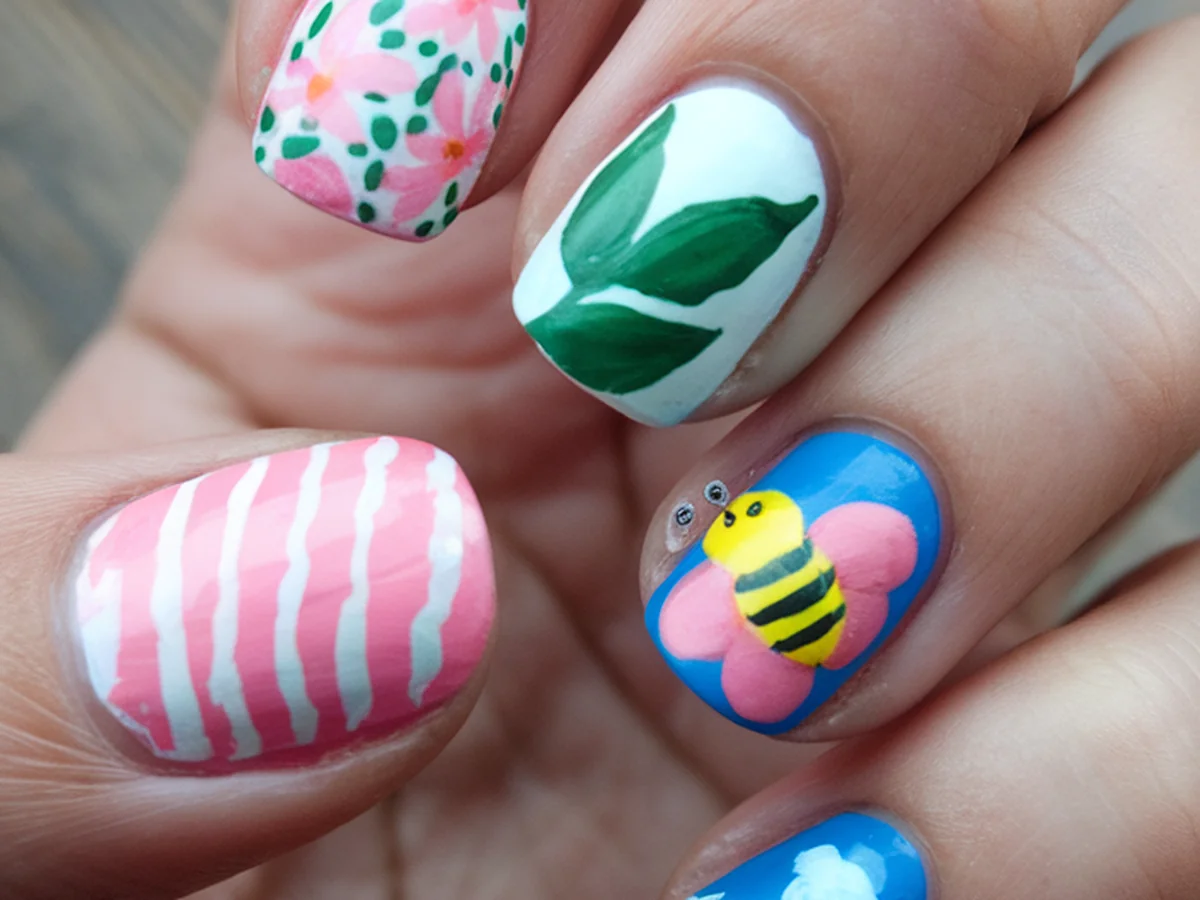
Cute Cartoon Characters and Critters
Inject a playful spirit into your spring nail art with cute cartoon characters and critters. Whether it’s adorable bunnies or colorful butterflies, these designs are sure to bring a smile to your face. Here’s a simple guide to painting a cute bunny:
1. Base Color: Start with a light pink or white base color on all your nails. Allow it to dry completely.
2. Draw the Bunny: Using a fine brush, outline the shape of a bunny on your chosen accent nail. Focus on a round head, big ears, and a small body.
3. Fill in Colors: Fill in the bunny’s ears with a softer pink and add black dots for the eyes. You can also add a small pink nose and a tiny smile to give your bunny character.
4. Add Details: Consider adding small flowers around the bunny or even painting little carrots nearby for an added spring touch.
5. Finish: Seal your design with a top coat to ensure it stays vibrant and protected.
Using fine brushes will help with adding intricate details, so don’t hesitate to invest in a good set. Personalize your nails with your favorite cartoon characters or animals, and let your creativity shine!
Geometric Patterns for a Modern Twist
If you’re drawn to minimalist and modern designs, geometric nail art is an excellent choice for spring. These patterns can be both chic and striking, allowing for a contemporary take on seasonal nails. Here’s how to create a simple geometric pattern:
1. Choose Your Colors: Select two or three contrasting colors that pop against each other. Bright yellows, blues, and whites can create an eye-catching look.
2. Base Coat: Apply a solid color as your base coat and let it dry.
3. Use Tape for Clean Lines: Cut small strips of tape and place them on your nails to create various shapes such as triangles, stripes, or squares. This will help you achieve clean lines.
4. Add Color: Paint over the taped areas with your contrasting colors. Once dry, carefully peel off the tape to reveal sharp geometric shapes.
5. Finish with Top Coat: Apply a top coat to protect your design and give it a glossy finish.
Geometric patterns offer an opportunity to play with symmetry and color. Experiment with different shapes and layouts, and don’t be afraid to mix colors for a fun spring vibe.
Watercolor Effect Nails
The watercolor technique is a beautiful way to achieve a soft, blended look that evokes the essence of spring. This method mimics the delicate strokes of watercolor paintings, creating a dreamy effect on your nails. Here’s a simple guide to achieving watercolor nails:
1. Prepare Your Base: Start with a clear or light-colored base coat. Let it dry fully.
2. Choose Your Colors: Select a few pastel shades that you wish to blend.
3. Dab and Blend: Using a fine brush or a makeup sponge, apply small amounts of nail polish in various areas of your nail. For a watercolor effect, use a light touch, allowing the colors to blend into each other.
4. Create Depth: For added depth, you can go over certain areas with more color, layering it lightly. The key is to keep the application soft and airy.
5. Seal with Top Coat: Once you’re satisfied with the watercolor effect, finish with a top coat to enhance the look and protect your design.
This technique is perfect for those who appreciate a more organic, artistic style. Feel free to experiment with different color combinations and blending techniques to create your own unique masterpiece.
Seasonal Themes: Easter and Spring Celebrations
Spring brings with it a flurry of holidays and celebrations, most notably Easter. Embrace the festive spirit with themed nail art ideas that are easy to replicate at home. Here are a few fun ideas:
– Easter Eggs: Paint your nails in pastel colors and use a fine brush to create intricate designs resembling decorated Easter eggs. Stripes, polka dots, and floral patterns work beautifully.
– Bunnies and Chicks: Create designs featuring cute bunnies or fluffy chicks. Use simple shapes and colors to make these critters come alive on your nails.
– Glitter Accents: Add a touch of sparkle to your designs by incorporating glitter or gems. A sprinkle of glitter can elevate your nail art, making it festive and fun.
Here’s how to create an Easter egg design:
1. Base Coat: Start with a pastel base color.
2. Design the Eggs: Using different colors, paint small oval shapes on your nails.
3. Add Details: Once the base of the eggs is dry, use a fine brush to add stripes, dots, or floral patterns.
4. Finish with Glitter: For an extra festive touch, apply a layer of glitter polish over the eggs.
5. Top Coat: Seal your work with a top coat to keep it looking fresh.
Participating in seasonal celebrations through nail art is a great way to engage your creativity and share your designs with friends and family. Encourage others to join in on the fun, and don’t forget to share your creations online!
Maintenance Tips for Your Nail Art
Once you’ve put in the effort to create beautiful nail art, you’ll want to ensure it lasts as long as possible. Here are some maintenance tips to keep your designs looking fresh:
1. Top Coat: Always apply a top coat after your nail art is complete. This not only adds shine but also helps protect your designs from chipping and fading.
2. Use Cuticle Oil: Regularly applying cuticle oil can help keep your nails healthy and moisturized, preventing breakage and keeping your nail art looking good.
3. Avoid Water for a While: Try to avoid soaking your nails in water for the first few hours after applying nail art. This can help the polish set better and last longer.
4. Regular Nail Care: Establish a nail care routine that includes filing, buffing, and moisturizing your nails. Healthy nails provide a better canvas for your designs.
5. Experiment and Change Designs: Don’t be afraid to change your designs frequently! Nail art is all about creativity, so have fun experimenting with new styles and colors.
By following these tips, you can enjoy your spring nail art to the fullest while also caring for your nails in the process.
Conclusion
Creating and wearing charming spring nail art is not just a fun activity; it’s a delightful way to express your creativity and embrace the beauty of the season. Whether you opt for floral designs, pastel ombre, or playful cartoon characters, each design tells a story and adds a touch of joy to your everyday life. We encourage you to try out these designs, share your experiences, and let your creativity flourish. Remember, nail art is about having fun and feeling good about your self-expression. Stay tuned for more nail art ideas and trends, and keep those creative juices flowing!
Frequently Asked Questions
What are some beginner-friendly nail art techniques?
For beginners, techniques such as dotting, striping, and using stencils are great starting points. Dotting tools can help create flowers and polka dots, while striping tape allows for clean geometric lines. Simple designs like accent nails or color-blocking can also be easy to master and look impressive.
How can I make my nail art last longer?
To ensure your nail art lasts, apply a good quality top coat after your designs are complete. Additionally, avoid soaking your nails in water for a few hours after application, and regularly apply cuticle oil to keep your nails healthy and moisturized.
Can I use regular nail polish for nail art?
Yes, regular nail polish can be used for nail art, but it’s advisable to use high-quality brands that offer good pigmentation and durability. Specialty nail art polishes may be more suitable for intricate designs due to their consistency and formula.
How do I remove nail art without damaging my nails?
To remove nail art safely, use a gentle acetone-free remover. Soak a cotton ball in the remover and press it against your nail, allowing it to sit for a few moments to break down the polish. Gently wipe it away, and avoid harsh scrubbing to prevent damaging your nails.
Where can I find inspiration for new nail designs?
Inspiration for nail art can be found in various places, including social media platforms like Instagram and Pinterest. Nail art blogs, YouTube tutorials, and nail art communities also offer a wealth of ideas and techniques to try out. Don’t hesitate to experiment and develop your unique style!