
Introduction
Spring is a magical time of year, a season that brings with it a sense of renewal and the vibrant colors of nature coming back to life. As the days grow longer and the weather warms, many of us find ourselves inspired to refresh our homes and indulge in creative pursuits. This is the perfect time to roll up your sleeves and engage in some DIY projects that not only enhance your living space but also allow you to express your unique style. Have you ever wondered how a simple handmade wreath or a creatively upcycled piece of furniture could transform your environment? What about adding a splash of color to your table with spring-themed centerpieces? Let’s explore some exciting DIY projects that can turn your weekend into a productive and fulfilling experience.
“Creating a cozy reading nook is all about maximizing comfort in a small space. It’s about intentional design that serves both function and feeling.”
– Interior Design Magazine
Colorful Spring Wreaths
Materials Needed
Creating a colorful spring wreath is a delightful way to welcome the season. To start, gather your materials. You will need a wreath base, which can be made from foam, grapevine, or wire. Next, choose your flowers—consider vibrant options like tulips, daffodils, or even faux flowers for longevity. Ribbons in pastel shades or floral patterns can add a beautiful finishing touch. Don’t forget wire cutters, hot glue, and floral tape to secure everything in place.
Step-by-Step Instructions
Begin by cutting your flowers to the desired length, ensuring they will sit nicely on your wreath base. Start by attaching the larger flowers first, using hot glue to secure them in place. Once you have the outline established, fill in the gaps with smaller flowers and greenery. Wrap your ribbon around the base or create a bow to add a personal touch. This process can be both meditative and rewarding, so take your time and enjoy your creative flow.
Placement Ideas
Once your wreath is complete, think about where you’d like to display it. The front door is a classic choice, but you can also hang it indoors on a wall or above a mantelpiece. Consider using it as a centerpiece by placing it on a table with candles or decorative items in the center.
Personalization Tips
Make your wreath truly yours by incorporating unique elements. Perhaps add a small sign with a seasonal greeting, or include personal items like photos or trinkets that hold special meaning. This will not only enhance the aesthetic but also make the wreath a conversation starter.
Garden Planters from Recycled Materials
Choosing Materials
Recycling materials to create garden planters is an eco-friendly and cost-effective way to beautify your outdoor space. Look around your home for items that can be repurposed, such as old tires, wooden crates, or even plastic bottles. These materials can serve as excellent bases for your new planters, helping to reduce waste while adding character to your garden.
Preparation Steps
Before you start planting, it’s essential to clean and prepare your chosen materials. For tires, ensure they are free of dirt and debris. Wooden crates may need a light sanding to prevent splinters. For plastic bottles, create drainage holes at the bottom to prevent water from pooling. Proper preparation is key to ensuring the longevity of your planters.
Plant Selection
When it comes to planting in your DIY planters, consider vibrant spring flowers like pansies, petunias, or marigolds. Herbs such as basil or mint are also excellent choices for smaller planters. Make sure to select plants that thrive in your local climate and align with the amount of sunlight your planters will receive.
Decorative Ideas
Add a personal touch to your planters by painting them in bright colors or patterns. For wooden crates, consider stenciling a design or adding a rustic finish. You could also use rope or twine to wrap around the planters for a more textured look. Personalizing your planters not only enhances their visual appeal but also helps them reflect your personality.
Homemade Birdhouses
Design Ideas
Building a birdhouse can be a fun and rewarding project, especially as spring brings a flurry of activity from local bird populations. Consider various designs depending on the bird species you want to attract. For example, a simple box design works well for bluebirds, while a more elaborate structure may be needed for wrens.
Building Materials
Select a sturdy wood type like cedar or pine, which are both durable and weather-resistant. You will also need basic tools such as a saw, hammer, nails, and a drill for creating the entrance hole.
Step-by-Step Construction
Begin by cutting out the pieces for the birdhouse: front, back, sides, bottom, and roof. Assemble the walls first, securing them with nails. Attach the bottom piece next, then add the roof to complete the structure. Remember to drill an entrance hole that is the appropriate size for the birds you wish to attract.
Finishing Touches
Once assembled, paint your birdhouse in bright colors or natural finishes to blend into your garden. Avoid using toxic paints, as they can harm the birds. Instead, you might opt for eco-friendly options or simply leave the wood untreated. Add a perch below the entrance for extra charm, and hang your birdhouse in a sheltered location to welcome your feathered friends.
Upcycled Furniture Makeover
Choosing the Right Piece
Upcycling furniture is a fantastic way to breathe new life into old pieces while adding unique flair to your home. Look for items that may need a little TLC—perhaps an old chair, a tired dresser, or a side table with potential. The key is to choose something with good bones that you can easily transform.
Preparation Process
Start your makeover by cleaning the furniture thoroughly. Remove any hardware and give it a light sanding to prepare for painting. This step is crucial, as it helps the paint adhere better and results in a smoother finish. If you’re working with an upholstered piece, consider reupholstering it with vibrant fabric that complements your spring aesthetic.
Painting Techniques
There are several painting methods to consider. Chalk paint provides a matte finish that can be distressed for a vintage look, while spray paint offers a smooth, modern finish. If you want to add texture, consider using a sponge or rag to apply paint in a stippling technique. Whichever method you choose, be sure to apply multiple thin coats for the best results.
Adding Decorative Elements
Once the paint is dry, consider adding decorative elements to elevate the piece. Use stencils to create patterns, decoupage with spring-themed paper, or replace old hardware with unique knobs that reflect your style. These finishing touches can transform your furniture into a statement piece that brightens your space.
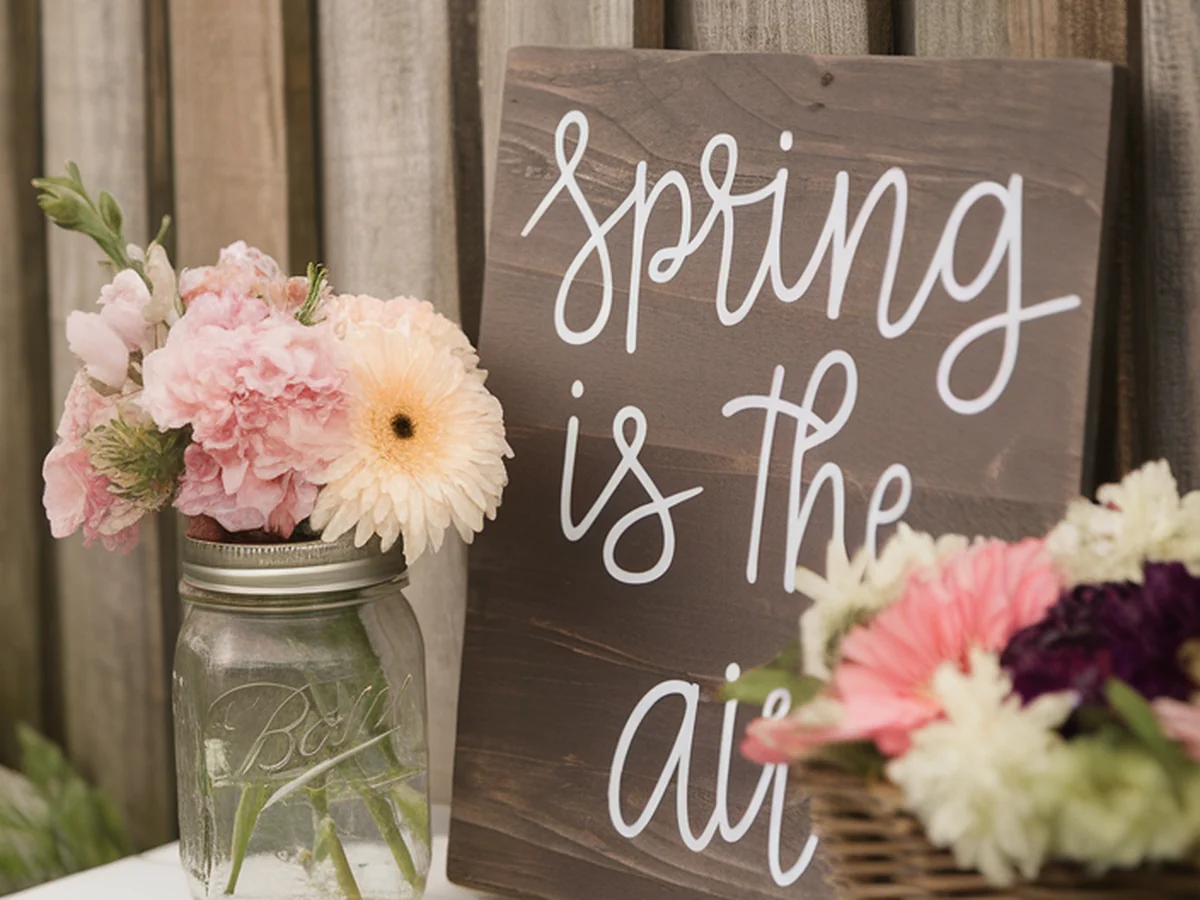
Spring-Themed Table Centerpieces
Material Ideas
Creating spring-themed table centerpieces is a wonderful way to celebrate the season and bring a touch of nature indoors. Gather materials such as fresh flowers, seasonal fruits, and leafy greens. You can also incorporate decorative items like vases, jars, or even rustic wooden boxes to house your arrangements.
Arrangement Techniques
When arranging your centerpiece, start with a focal point, like a large floral arrangement or a bowl of colorful fruits. Build around this with smaller items, ensuring the arrangement has balance and symmetry. Use floral foam for stability if using fresh flowers. Experiment with different heights and textures to create visual interest.
Seasonal Themes
Consider the occasion when creating your centerpiece. For a spring brunch, you might focus on pastels and light colors, while a garden party could feature bold, vibrant hues. Incorporate elements like Easter eggs or greenery to enhance the seasonal theme and make the centerpiece feel festive.
Incorporating Candles
Candles can add warmth and ambiance to your centerpiece. Place them amidst the flowers or fruits, ensuring they are secure and won’t pose a fire hazard. Use various heights and styles of candles for a layered look, and consider using scented candles with spring fragrances like lavender or citrus to engage the senses.
DIY Outdoor Lighting Solutions
Lighting Options
As the evenings grow warmer, outdoor lighting becomes essential for enhancing your space. Consider options like solar lights, string lights, or lanterns. Solar lights are eco-friendly and easy to install, while string lights can create a cozy atmosphere for gatherings. Lanterns provide versatility and can be moved as needed.
Installation Tips
When installing outdoor lighting, ensure that all wiring is safe and weatherproof. For solar lights, simply stake them into the ground in areas where they will receive ample sunlight during the day. String lights can be hung from trees or along fences, while lanterns can be placed on tables or hung from hooks.
Creative Uses
Think about how you can use lighting to enhance different areas of your outdoor space. Illuminate pathways with solar lights for safety, or use string lights to outline a patio for a festive look. Lanterns can create focal points in gardens or seating areas, adding charm and inviting warmth.
Safety Considerations
While installing outdoor lighting, safety should be your top priority. Ensure all electrical connections are secure and waterproof. If using extension cords, avoid running them through areas where they may become a tripping hazard. Regularly check all lighting fixtures for wear and replace any that show signs of damage.
Spring-Themed Wall Art
Inspiration Sources
Spring-themed wall art can bring the beauty of the season indoors. Look for inspiration in nature—think blooming flowers, lush greenery, or vibrant landscapes. You can also find motivation from quotes that celebrate the season or seasonal themes like Easter.
Materials Required
To create your wall art, gather materials such as canvas, paint, and decorative items like fabric, paper, or natural elements. Consider using acrylic paints for their vibrant colors and quick drying time. You may also want stencils or brushes for detailed designs.
Techniques to Explore
Experiment with different techniques to create your art. Painting with bold colors can create striking pieces, while stenciling allows for intricate designs. Consider mixed media approaches by incorporating elements like fabric or pressed flowers for added texture. Don’t be afraid to let your creativity flow!
Displaying Art
Once your artwork is complete, think about how to display it. Group smaller pieces together for a gallery wall effect, or choose a larger canvas as a standalone statement piece. Use frames that complement the art and your decor, and consider hanging them at eye level for the best impact.
DIY Spring Scented Candles
Ingredients Overview
Making your own scented candles can add a delightful aroma to your home while also serving as a creative outlet. Gather ingredients such as beeswax, essential oils, and wicks. Beeswax is a natural option that burns cleanly, while essential oils allow you to customize the fragrance to your liking.
Step-by-Step Instructions
Begin by melting the beeswax in a double boiler until it reaches a liquid state. Once melted, remove it from heat and add your chosen essential oils, stirring thoroughly to combine. Prepare your containers by placing the wick in the center, then carefully pour the melted wax into the containers. Allow them to cool completely before trimming the wick.
Scent Combinations
Consider using spring-inspired scent combinations to evoke the essence of the season. For example, a blend of lavender and lemon can create a refreshing aroma, while eucalyptus and mint can provide a soothing effect. Experiment with different ratios until you find the perfect fragrance for your candles.
Decorative Containers
Your candle containers can be as unique as the scents you create. Use glass jars, teacups, or even terracotta pots for a rustic touch. Decorate the outside of the containers with twine, lace, or paint to match your home decor and enhance the overall presentation.
Conclusion
Engaging in DIY projects during the spring season is not only a wonderful way to express your creativity but also a fulfilling method to refresh your living space. Whether you choose to create colorful wreaths, upcycle furniture, or make aromatic candles, each project can bring joy and a personal touch to your home. So, why not pick one or more of these projects to try over the weekend? Your living space will thank you for it! We would love to hear about your experiences—share your creations and ideas in the comments or tag us on social media!
| Element | Small Space Solution | Benefits |
|---|---|---|
| Furniture | Multi-functional pieces | Saves space |
| Storage | Vertical solutions | Maximizes wall space |
| Decor | Minimalist approach | Reduces visual clutter |
Frequently Asked Questions
What are some easy DIY projects for beginners?
If you’re new to DIY, consider starting with projects that require minimal materials and tools. Simple tasks like creating a colorful wreath, painting a small piece of furniture, or making a basic birdhouse are great options. These projects allow you to practice your skills without feeling overwhelmed, and they can quickly transform your space.
How can I personalize my DIY projects?
Personalization can be achieved in numerous ways. Incorporate your favorite colors, patterns, or materials that resonate with your style. Adding unique elements like family photos, meaningful quotes, or custom finishes can also make your projects truly one-of-a-kind.
What tools do I need for basic furniture upcycling?
For basic furniture upcycling, you’ll need a few essential tools: sandpaper or a sander for preparing the surface, a paintbrush or spray paint for applying color, and a screwdriver for removing hardware. Depending on the complexity of the project, you may also need a saw or drill for more advanced modifications.
How can I ensure my DIY candle scents last longer?
To ensure your DIY candle scents last, use a higher concentration of essential oils when mixing with the wax. Additionally, allowing the candles to cure for a few days before burning can help to intensify the fragrance. Avoid over-melting the wax, as this can diminish the scent’s potency.
Where can I find inspiration for my DIY projects?
Inspiration can be found in various places. Websites like Pinterest, home decor blogs, and DIY forums are excellent resources. Nature itself can also provide ideas through its colors and textures. Don’t hesitate to explore your surroundings and let your creativity guide you!